June 7th, 2018 by
5 Easy Plants You Can Grow That'll Give You Tasty Fruit and Veg!
Growing your own fruit and veg is one of the most satisfying things about gardening. Food always tastes a little better when you’ve watched it transform from a seed into a delicious meal over the course of a few months. Most people know the basics of growing everyday food, like herbs, tomatoes, and carrots. However, there’s a whole world of fruit and veg out there that you can grow! We’ve pulled together some of the most exciting – and tasty – fruit and veg you can easily grow in your garden or allotment to spice up your meals and liven up your lunchboxes! Eating healthy doesn’t have to be boring, so read on to learn about the delicious and nutritious oddities you can start growing right now!
Before You Start
Make sure you check you can actually grow these fruits and veg before you buy anything! We’ve picked the ones below specifically because they’re easy to grow, but you should still make sure you have enough space in your garden to grow them. Make sure there are no weeds or other plants growing around your plot, as you want there to be enough space underground for your veggies to take root! Make sure you’ve safely treated the area with weed killer if weeds are causing problems, and also ensure the area is getting lots of sunlight. If your plot is near your lawn, always go over the lawn with some iron sulphate. This will encourage your lawn to stay strong and healthy, which will, in turn, discourage any weeds and pests from springing up near your young fruit and veg plants. With that in mind, let’s get growing!
Cucamelons
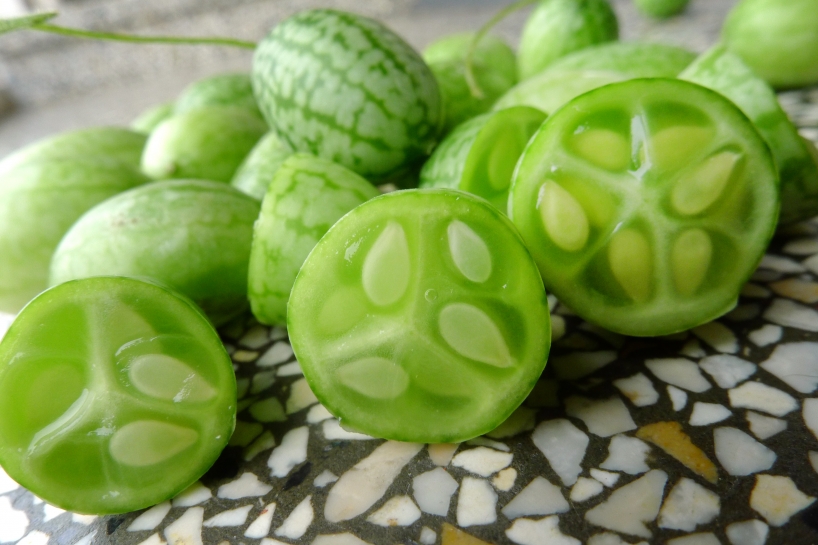
 Cucamelons are refreshing fruit that are as refreshing as a cucumber Cucamelons (also known as mouse melons) are quickly becoming the new trendy food, and it’s easy to see why - just look at them! These mini melons are a cute combination of cucumbers and watermelons that have a refreshing lime twist. They’re not just appealing to look at, though; they’re incredibly good for you and are packed with vitamins and antioxidants. Best of all, they’re very easy to grow!
How to Grow Cucamelons
 Use a trellis or a cage to allow your cucamelon vines to grow Cucamelons might look cute and fragile, but they’re pretty hardy plants. They don’t have any particular soil requirements, don’t need a greenhouse, and aren’t appealing to most pests. First up, you’ll need a trellis, a cage, or a fence, as cucamelons are climbing plants. Plant them indoors in April or May and move them outside once any risk of frost is gone. Make sure to plant them somewhere that gets a lot of sunlight! Make sure you give your new cucamelons lots of water and use some compost or other fertiliser to make sure there’s a lot of nutrients in the soil. Water them every five days or so throughout the summer, or twice a week if the weather is really hot. Cucamelons are slow to germinate, but just keep them watered and after a few weeks you should have a bumper crop of tasty fruit! Harvest them when they’re around the size of a grape, but don’t leave it too long as you want them to be firm and slightly crunchy, a bit like a cucumber. You can eat them straight off the vine or use them to add flavour and texture to your salads!
Pineberries
 Like reverse strawberries - pineberries are a pink-tinged white colour with red seeds These look like reverse strawberries – they’re white with red seeds! They’re a super sweet snack that tastes of pineapple with a hint of bubblegum. They also grow similarly to strawberries, so if you can grow strawberries, you can easily mix things up and grow pineberries!
How to Grow Pineberries
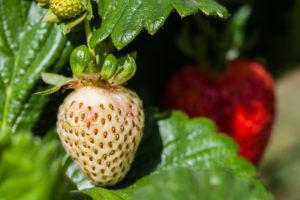 You can grow pineberries alongside regular strawberries Usually, you won’t be able to grow pineberries from seeds. Instead, most of what you’ll find online are pineberry starts (basically young plants that have just started to grow). Once you’ve ordered your starts, plant them in evenly-spaced rows about 30cm apart, much like you would with a strawberry plant. You can plant them more or less any time when there’s no frost as they’re perennials, but they’ll only flower around June. This means it’s best to plant them outside around April-May. Keep them watered around once a week, or twice a week in hot, dry weather. Pineberries are prone to root rot if you water them too much though, so make sure the water is draining through your soil properly. Use compost or other fertiliser when you first plant them to give them all the nutrients they need. You can also top this up with some liquid fertiliser every month or so. Like strawberries, the more sunlight pineberries get, the better. One interesting thing to note is that the more sunlight they get, the pinker the fruit starts to turn. This doesn’t affect the flavour so don’t worry if your fruit seems pinker than you were expecting! The pale colour of pineberries means birds are turned off them, so you shouldn’t need to put a net over them! However, insects and some other small pests may still fancy their chances, so make sure to keep an eye on them. Pineberries aren’t usually as big as strawberries, so pick them before they start to turn mushy. Regular picking will encourage more fruit to grow! Pineberries add an exotic flavour to desserts and jams – or you can eat them as is for a sweet treat!
Tomatillos
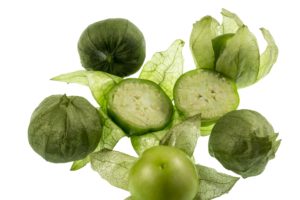 Tomatillos are strange-looking but very tasty - and good for you! These exotic fruits originate from Mexico, but luckily, they’re easy to grow in the UK too! They’re strange-looking things – they look like green tomatoes wrapped in elegant leaves, although they actually taste like cool peppers with a hint of sweet citrus. They were first grown by the Aztecs almost 3000 years ago, so growing a tomatillo will give you a little taste of ancient history straight from your back garden!
How to Grow Tomatillos
 Tomatillos are ripe when their leafy pod starts to split Much like tomatoes, you should plant your tomatillo seeds indoors in early spring. Once the danger of frost is gone in late spring, transplant them outside to a sunny and spacious area. While you can just grow them on the ground, it’s best to use a trellis or a tomato cage to let your tomatillo grow on so you don’t have to pick the fruit off the floor. A trellis is also a great idea because tomatillos are extremely fast growers and will spread out quite a lot, so you might want to control that growth a little! Plant them deeply in the soil and water them once a week. You can fertilise them if you want, but it’s not necessary – tomatillos grow just fine on their own! Tomatillos are not naturally appealing to pests but bear in mind they’re not self-pollinating. This means you’ll need to sow at least two plants in order to get some fruit. Harvest your tomatillos when the dainty husks that contain each fruit begin to split. You can use tomatillos to add an extra tang to Mexican dishes and salsa!
Kohlrabi
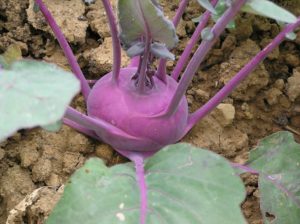 Kohlrabi comes in purple and white varieties If you want a vegetable that not only tastes great but looks stunning in the garden, you’ll want some kohlrabi! Kohlrabi looks like it comes from another planet, but it’s a close relative of the cabbage and has a mildly spicy taste, like a cross between mustard, a radish, and turnips.
How to Grow Kohlrabi
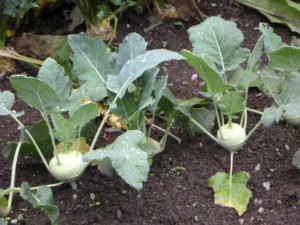 You can eat both the leaves and the bulb of a kohlrabi, but make sure to get the leaves while they're still young Unlike most of the other entries on this list, kohlrabi grows better in cooler weather. This means your best approach is to sow them indoors in late summer, and after around 4-6 weeks, transplant them outdoors. Before you plant them outdoors, make sure you’ve worked some compost into the soil where you intend to plant them. Pick a sunny location so that the kohlrabi can absorb lots of sunlight through its trademark huge leaves. Make sure to water the area regularly and keep it clear of weeds and pests. The kohlrabi should grow in around two months. There are actually two parts of a kohlrabi that can be harvested; the leaves and the bulb. Both are incredibly nutritious, so it’s a shame to waste either part! You can start harvesting the leaves when the plant is still young. Make sure the leaves you harvest are small, otherwise they’ll be too tough to eat. Also, don’t harvest too many leaves - remember the plant still needs them to grow! You can use the leaves to spice up a salad or use them in a curry! You can cook or steam them to make them extra-tender. As for the bulb, remember the golden rule of kohlrabi: bigger isn’t better! Harvest the bulb when it’s around 3 inches wide. If you let it get too big it’ll be too tough and bitter. If you harvest it when it’s still fairly small and tender, you can use it in virtually anything! Eat it raw, grate it into a coleslaw, mix it into stews, steam it, roast it, sauté it – you can do what you like to get that warming, spicy taste in virtually any meal!
Black Cumin
 Black cumin is an essential ingredient in any curry This versatile spice goes by many names; black cumin, fennel flower, and devil in a bush among many others. It’s popular around the world as it’s easy to grow and looks great while it flowers with its pretty purple-blue blooms. It also produces a really versatile spice, and its seeds can be crushed and used in curries and stews. Black cumin has a rich, onion-like taste with a peppery kick. Why not spice up your life with a little black cumin?
How to Grow Black Cumin
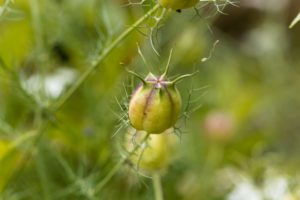 Take the seed pods to get at the cumin seeds inside Like many other plants, your best bet is to start by sowing your seeds indoors first. Sow them 2-3 weeks before the last frost, then transplant them outside in a sunny area with good drainage. Feed and water your plants regularly once they’re outside – this shouldn’t be too challenging as they’ll germinate in under 3 weeks! Black cumin can be susceptible to pests and disease, so make sure you keep a close eye on it throughout the summer. Make sure to take care of any plants that are infected with a disease quickly, before it spreads. After that, wait until the flower transforms into a seed pod. This should be done by late summer. Don’t leave it too long as the plant can wilt if you don’t harvest the seeds in time. Pick the seed pods off and split them to reveal the seeds inside. You can use the seeds in cooking as is, but a better idea is to dry some of them out and crush them up. Cook the seeds in a pan until they start to darken and give off a faint smell but be careful not to overdo it. You don’t want that rich cumin flavour to be replaced by a burnt bitter taste! Once they’re dry, crush them and seal the powder in an airtight container. You’ve now got your own homegrown cumin supply, perfect for use in curries, soups, and seasonings!


